


When an electronic circuit or piece of equipment stops working as it should, knowing where to start can sometimes be the hardest part. Electronics fault finding is the process of working through a circuit systematically to identify what has gone wrong and, ultimately, find the cause of the problem.
For someone new to electronics, a circuit board full of components, connections and test points can look pretty intimidating. But fault finding doesn’t have to begin with complicated testing. In fact, some of the most useful first steps are also the simplest.
In this guide, we’ll look at some of the essential tools and knowledge for electronics fault finding, and where to begin when you’re faced with a faulty circuit.
Or you can head straight to the details of our Introduction to Electronic Fault Finding course here.
1 – Start with a Visual Inspection
Before reaching for any test equipment, start by simply looking.
A careful visual inspection can reveal a surprising amount and may give you an immediate indication of where the problem lies.
Look for things such as:
- Burnt, cracked or damaged components
- Discolouration or signs of overheating
- Loose or broken connections
- Damaged tracks on a PCB
- Corrosion or contamination
- Poor or cracked solder joints are some of the issues that can arise when soldering
- Bulging or leaking capacitors
- Components that appear to be incorrectly fitted
It’s also worth using your other senses where appropriate. An unusual smell, for example, can sometimes indicate that a component has overheated or failed.
The important thing is to take your time. Something that initially looks insignificant could be the clue that leads you to the fault.
2 – Take a Closer Look with a Microscope
Not every fault can be easily seen with the naked eye.
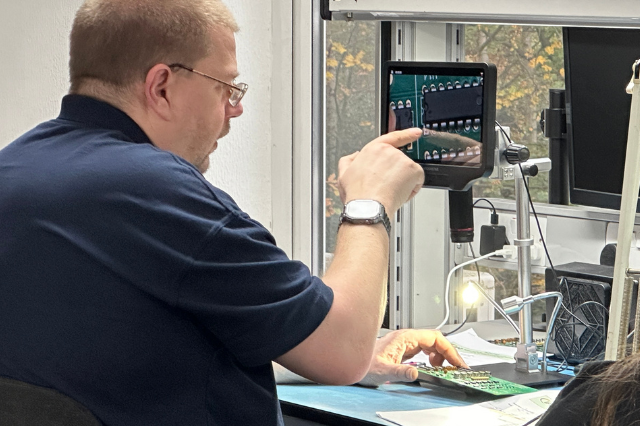
A microscope or suitable magnification equipment allows you to examine components, solder joints and PCB features in much greater detail.
This can be particularly useful when working with smaller components and densely populated circuit boards, where faults such as tiny cracks, solder bridges, damaged tracks or poor solder joints may otherwise be difficult to spot.
Visual inspection and magnification are useful starting points because they allow you to gather information before you begin electrical testing.
3 – Understand the Basic Components
You don’t need to know everything about electronics before you begin learning fault finding, but a basic understanding of electronic components and their functions is pretty essential.
You should start to become familiar with components such as:
- Resistors
- Capacitors
- Diodes
- Transistors
- Integrated circuits (ICs)
- Inductors
- Connectors, switches and relays
Knowing what a component is supposed to do makes it much easier to understand what might happen when it fails.
For example, understanding the basic purpose of a resistor or capacitor gives you a starting point when deciding what measurements to take and whether the results you’re seeing make sense.
Our Introduction to electronics fundamentals course is a great place to start if you are completely new to electronics.
4 – Use Circuit Diagrams and Technical Information
If a circuit diagram or schematic is available, it can be one of your most valuable fault-finding tools.
Rather than viewing the PCB as one complicated collection of components, a diagram helps you understand how the circuit is supposed to work.
For example, a very simplified power circuit might look like:
Power Input → Protection → Power Supply → Control Circuit → Output
If the expected voltage is present at the input but missing further along the circuit, you can begin narrowing down the area in which the fault is likely to be.
Schematics may also provide component values, test points and expected voltages, giving you something to compare your measurements against.
The aim of fault finding isn’t to randomly test components until you happen to find something wrong. It’s to use the information available to gradually narrow down the possibilities.
5 – Compare It with a Working Unit
If you have access to an identical, fully functioning piece of equipment or PCB, it can be extremely useful.
A unit that is known to be fully working gives you a real-world reference.
You can compare things such as:
- Component appearance
- Resistance readings
- Voltages
- Waveforms
- Signals at particular test points
- Component behaviour
If you’re getting one result from the faulty board and something completely different from the working board, you’ve just gained another clue.
It’s important to remember that a difference doesn’t automatically mean you’ve found the faulty component, but it can help you identify the area that needs further investigation.
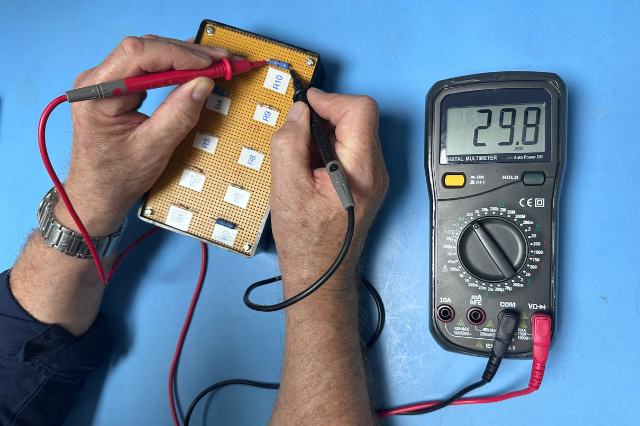
6 – Learn to use a Multimeter
For anyone learning electronics fault finding, a digital multimeter is one of the most important pieces of test equipment to understand.
Depending on the meter and what you’re testing, it can be used to measure voltage, resistance, current, continuity and diodes.
Rather than simply telling you whether something is “working” or “not working”, these measurements help you build a picture of what’s happening inside the circuit.
For example, continuity testing can help identify a broken connection, while voltage measurements can help you follow a power supply through different stages of a circuit.
The important part isn’t simply knowing how to take a measurement. You also need to understand what that measurement means and what you should test next based on the result.
7 – Use an Oscilloscope to See What’s Happening
A multimeter can tell you a lot, but sometimes you need to see how an electrical signal is behaving over time.
That’s where an oscilloscope comes in.
An oscilloscope displays electrical signals as waveforms, allowing you to investigate things such as signal shape, voltage levels, frequency, timing, noise or distortion and missing or abnormal signals.
When a circuit has the correct supply voltage but still isn’t behaving correctly, an oscilloscope can help you investigate what’s happening to the signals within it.
For beginners, oscilloscopes can initially look complicated. Learning the basic controls and how to interpret a waveform, however, opens up a whole new level of fault finding.
Don’t Just Find the Fault – Ask Why It Happened
Finding a failed component isn’t necessarily the end of the fault-finding process.
If you replace a damaged component without understanding why it failed, the same problem could simply happen again.
Once you’ve identified the immediate fault, consider what might have caused it.
Was the component itself defective? Has something elsewhere in the circuit caused it to fail? Has the equipment been subjected to excessive heat, voltage, current, contamination or physical damage?
Good fault finding is about finding the root cause, not just the most obvious symptom.
A Simple Electronics Fault-Finding Process
While every fault is different, a basic process might look something like this:
- Understand the reported problem
What should the equipment be doing, and what is it doing instead? - Carry out a visual inspection
Look for obvious signs of damage or anything unusual. - Gather information
Find circuit diagrams, technical documentation and, where possible, a working unit for comparison. - Identify the likely area of the circuit
Use your understanding of how the circuit works to narrow down the possibilities. - Test and measure
Use equipment such as a multimeter, oscilloscope or component tester to investigate further. - Compare your results
Are the readings what you would expect? How do they compare with the schematic or a known-good unit? - Narrow down the fault
Use each result to decide what to test next rather than testing components at random. - Identify the root cause
Once you’ve found the problem, consider why it happened before carrying out the repair.
Learning Electronics Fault Finding with The Electronics Group
Electronics fault finding is a skill that develops with practice. The more you understand about components, circuits and test equipment, the easier it becomes to interpret what you’re seeing and decide what to investigate next.
For beginners, the key is to develop a logical and systematic approach. Start with the basics, gather as much information as you can and use each inspection or measurement to narrow down your search.
At The Electronics Group, our Electronics Fault Finding training course is designed to help delegates develop these practical skills and build confidence using fault-finding techniques and electronic test equipment.
If you’d like to develop your electronics fault-finding skills, you can view our course information on our website or get in touch with our team to discuss the right training for you.